About Us
Create a PowerPoint
If you are planning a presentation, you may want to use PowerPoint as a visual aid. Many people use PowerPoint software to create slideshows as part of their successful presentations for meetings or for classes they teach. Because you will break down your PowerPoint presentation into slides covering various ideas, you may want to start out by writing an outline covering everything that you want to present.
1. Get Started
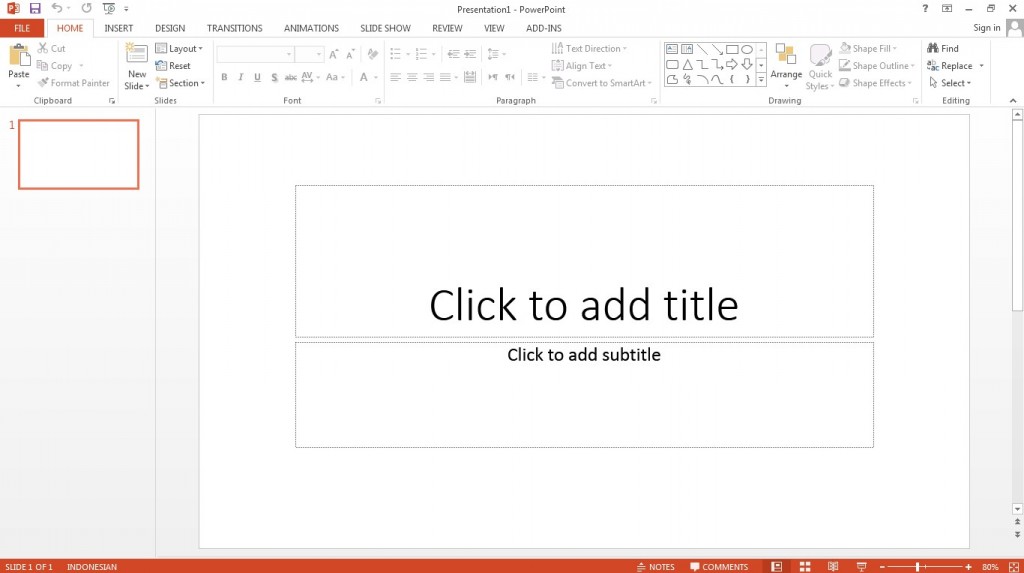
You can find PowerPoint on any of the Library’s computers by clicking on Microsoft Office 2013. Once you are in PowerPoint, you can start out by searching for a theme or template that contains the colors and style that you would like to use.
2. Choose a style
Choose a layout style, insert text boxes, and start typing text onto your slides. In the Home tab, choose your font and font size.
3. Effects
Under Drawing Tools/Format, you can choose a word art style, if you like, and select color, outline, and any special effects you might want.
Tip — Instead of typing out paragraphs on your slides, use bullets or numbers for simplicity and ease of reading, and to help prevent you from reading your presentation straight from your slides. Simple, attractive slides can help keep the presentation interesting; when your slides contain too much text, you may find your audience reading your slides instead of listening to your delivery!
4. Presentation view
When you are ready to practice presenting, you can choose a presentation view. If you would like your notes visible to you on your monitor only when you are presenting, you can do that – or keep the presentation full-screen for your audience as well as on your monitor.
Tip — Don’t risk losing your work! We highly recommend that as soon as you start typing your PowerPoint, you should save it to a flash drive. All data on the public computers is erased every night, as well as every time the computer is shut down and restarted.
5. Add Pictures
You can add pictures to your slides! Choose a picture that you have saved and click on Insert. Next, place it where you would like it to appear. Smart Guides will automatically appear to help you place everything perfectly. Just be sure to give credit where credit is due for any photos or other copyrighted material that you use in your presentation.
6. Adding, Arranging, and Deleting Slides
You can easily add a new slide by clicking on “New Slide.” While putting together your slide show, you may find that you need to rearrange your slides. You can accomplish this task easily by clicking, in the pane on the left, the thumbnail of the slide that you want to move. Next, you can drag it to its new spot. You can also delete a slide by right-clicking on the thumbnail of that slide, then clicking on “Delete Slide.”
7. Advancing Your Slides Automatically or Manually
If you would like your PowerPoint to automatically advance the slides, you can set the speed and timing. You will probably want to manually advance the slides during your presentation, though, to give you better control. To advance to the next slide, you can press the “down” arrow on your keyboard.
8. Need More Help?
If you are having trouble creating a PowerPoint, you might benefit from one of the online classes listed below, which you can access via the Elmhurst Public Library website (EPL library card required).
- Office 365: PowerPoint Essential Training (LinkedIn Learning)
- PowerPoint 2013 Power Shortcuts (LinkedIn Learning)
Enjoy the process of creating your first PowerPoint. You can do it!

