About Us
Digitize Your LP
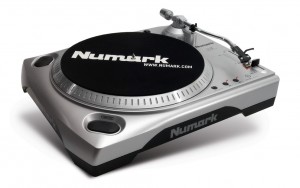
Numark TTUSB Turntable with USB Audio Interface
Turntable operation:
- Turntable should be plugged into computer via USB.
- Power on turntable.
- Place record on spindle, using 45 adapter if necessary.
- Select speed (33 or 45 RPM).
- Press play to start platter spinning.
- Lift tonearm and gently place onto outer edge of record.
- Check for signal coming through. (the loudest part of the song should reach the orange part of the meter in the converter software).
EZ vinyl/tape converter software:
- If you are prompted to select your playback device (Turntable or Tape Player), check the appropriate box and click Next.
- You can adjust the gain slider in the software next to the volume level meter (the loudest part of the song should reach the orange part of the meter).
- The software will split tracks automatically when it detects silence in the music. For best results, make sure your volume levels reach the orange part of the software’s volume meter during the loudest parts of the song. If your volume level is too low, EZ Vinyl/Tape Converter may have trouble detecting the difference between sound and silence. To split the tracks manually, uncheck the box labeled Automatically split recording into separate tracks or Split recording into tracks. (This is recommended for typical popular music, but may produce varied results when used with other genres like classical music, spoken word, etc.) When you are ready to start recording, click Record and immediately play your music (press Play, place the needle over the record, etc.).
- You are now recording. You should be hearing the audio from the device through your computer’s speakers and seeing the audio meters move. If you cannot hear your music, make sure your computer’s volume is not muted.
- If you chose to manually split your recording into tracks, you will see a New Track button. You can use this button to mark the beginning of a new track. When you have finished recording, click Next to proceed to the next step.
- Once you have finished recording, enter the Artist, Album and Track titles by clicking and typing into the corresponding fields. (The Track title will be the name of the converted file. The Album and Artist names will be the names of the folders it is saved in.)Note: If you have recorded more than 10 tracks, you can access the information for tracks 11-20 by clicking Next. When you are finished labeling your recording, click Next.
- The software will now export your recording to iTunes. Please allow the exporting process to complete. Once the software has exported your recordings to iTunes, you will see the screen on the right. Choose Yes if you would like to record again. Choose No if you do not wish to record more. When you have made your selection, click Next to record again or exit the application. You will now be able to access your recordings through your iTunes library.
- Switch over to your iTunes window; iTunes will open automatically once your tracks have been exported. Click on the Music library tab on the left and navigate to the Artist, Album, and Track titles which you entered for your recording.
- To retrieve the files right click on one of the songs and click Show in Finder, from there you will be able to email files, copy to USB drive, edit in DAW, etc.
To convert your files using iTunes:
- If you do not have iTunes, download and install it from apple.com/itunes.
- Open iTunes on your computer.
- In the menu bar, click Edit and select Preferences.
- In the Preferences window’s General tab, click the Import Settings button.
- Click the Import Using drop down menu and select the format you want to convert to.
- Click OK to close the Import Settings window, and then click OK to close the Preferences window.TIP: We recommend converting to MP3 since it is supported almost universally by audio playback applications, websites, etc. If you use mostly iTunes or other Apple software or devices, we recommend converting to AAC (.m4a), which has a slightly better sound quality than MP3.
- Locate your WAV files, and then click and drag them over the Library category of the sidebar in iTunes. The files will be added into your iTunes library.
- In your iTunes library, select the files you want to convert, right click them, and select Create ____ Version (the format you selected in Step 5). iTunes will create an additional version of those files in your desired format.
For more information, go to:

